I love pook a looz plush toys, and used that style as my inspiration when I designed my scriptural character puppets.  The simplicity of the wide-set, simple oval eyes, the lack of or minimal other facial features, all give the faces a charm that makes me smile.  Pook a looz are slightly melancholy, but in a sweet and vague way that is just enchanting!  That was exactly the feeling I was hoping to capture, and felt was lovely and appropriate for scriptural figures.

 Since my purpose in making the puppets was to teach the song "Nephi's Courage", and the song has specific characters in the lyrics, I made Nephi, Laban, Laman & Lemuel, and a boat to teach the first two verses. My kids are already requesting the rest of Lehi's family (at least)! And it is pretty obvious that if I wanted to, Laman or Lemuel could double as Noah, and the boat could be an ark - opening up the possibility of Bible story play as well.
Really, though I've never missed scripture puppets in my life - never sat around thinking, "oh man! If only I had some handpuppets of scriptural characters!" I have found already so many family and church uses for these fun guys that I'm so glad now that I have them!


Materials & Pattern
Now, if you're like me, when an idea strikes, I want to get going, not go shopping, so I used materials on hand.   I'm not sure that if I were BUYING supplies that I'd chose the same exact colors or fabrics, so don't feel restricted by what I chose - go crazy!  I love the way my turned out, and I'm just so glad that I don't ever throw anything away, but a whole craft/fabric store of options would be too much fun!

Start off with either fleece or felt - maybe about 3/8 of a yard.  I used fleece remnants (again, because I had it - also because it's soft).  Why fleece or felt?  They don't fray and you can sew them leaving the seams exposed rather than having to edge finish and turn inside out.  Faster, easier.  It is a definite look to leave the seams around the edges with the top stitching rather than hidden seams - but I like it for the "ancient" puppets.  You could turn the seams for a more finished look.

The body is cut from the main color, head and hands from whatever flesh color you like.  For bearded characters I worked out a beard shape, which I cut out of fleece of varying fancy furry styles or plain fleece in hair tones.  Trims and chording make belts, headbands, whatever clothing decor your creativity can come up with. The last bit you'll need is a head scarf, in two pieces, out of a remnant of fleece, felt or a non-fraying knit. Trims, ribbon and rick-rack make excellent headbands.

You'll also need some polyester fiberfill and black embroidery floss.

print pattern sheets on 8 1/2 x 11
The shape of the body may seem a little strange, but really it's not.  Just think that the puppet's head is stuffed, and the fingers need somewhere to go to support the head, and suddenly the shape of the body makes perfect sense.

Construction
A diagram of the pieces,
unassembled
1- Attach the hands to the body.  This one IS done right sides together (I know I said earlier that it's all done with top-stitching, but this is an exception.  Hands are put on right sides together).

Sword made out of 1/2 inch silver ribbon,
simply cut to shape and top-stitched
2- Tack any trims or decorations to the body (if it's something like a waistband, that will get caught into the side seams when the body sections are sewn together, tacking in place is all that is necessary.  If it is something that does NOT get caught in the side seams - such as Laban's sword - sew down permanently rather than simply tacking).

3- Once the hands are attached and the body is accessorized as you'd like it, sew all around the body, wrong sides together, leaving the bottom open, taking the smallest seam allowance you feel comfortable with.

Set the body aside for now.

4- Sew the head pieces together, wrong sides together, leaving the bottom (neck) open.  (Optionally, if you'd like to embroider the eyes on before sewing the front of the head to the back of the head, you can do that.  I like to wait until after the beard is on and the head is stuffed so that my eye placement ends up exactly where I want it to be.  But if it's easier to put the eyes on the separate face piece, now is the time!)

5- If the character has a beard, pin it in place and sew around on the same stitching line as around the head, from dot at cheek, around the top of the head to dot at other cheek.  Sew across the top (lip) of the beard by hand with a running stitch, so as not to go through both layers of the head - it should just end up tacked to the face, not the back of the head.

6- Stuff the head and attach to body by hand using a running stitch.  I just left the raw edges and let my running stitch show, as I had done with the machine sewn parts - but feel free to turn the edges under and slip stitch for a neater, cleaner look.

7- For the head scarf, attach headband to the front (half moon shaped) section.  Then sew the two pieces together - this time right sides together - and turn right side out.  Hand stitch in place by "stitching in the ditch" - in other words working your stitches through the seam of the scarf and attaching to the top of the puppet's head.  I tried just tacking the head scarf on in two spots, but it was QUICKLY dismantled by little hands - so I recommend stitching all the way along the top of the scarf.

8- Finally the face.  I like to leave the face till last to make sure the eyes don't end up too high or too low relative to the scarf or the beard or whatever - since those shift around in sewing and nothing ever ends up perfectly where you plan it.  The charm of the pook-a-looz is the simplicity of features.  Just eyes, or eyes and a distinguishing feature that adds expression.  Mark where the eyes should go with a pencil, then, using all strands of black embroidery thread, add eyes using a satin stitch - starting at the top of the eye, increasing length of the stitch, then decreasing at the bottom of the eye to make an oblong shape.  Laban is "wicked," so he gets evil eyebrows and a shady mustache.
Details like Laban's brass plates are added on at the very end.  I made my "plates" out of craft foam, laced with beading wire and painted with pseudo-Egyptian characters.

The Boat
Since the second verse of the song has a boat - I designed a simple boat that the kids could use as a visual/ puppet show prop.  Then it was my daughter, Lily's idea that I actually make the boat double as puppet storage!  Clever girl!  The boat base is craft foam.  Then I simply topped it with a layer of batting and brown fleece - machine quilting in windows.  Another piece of fleece becomes the hull of the boat - sewn top-stitches in bright yellow give some "planks," before it is top-stitched on as well and the whole thing zig-zagged around to seal the edges which were fuzzy white from the batting (not boat-like at all).


So those are my first scripture puppets! I can't wait to try some female characters!  And I'm SURE my kids will have ideas for other favorite scripture stories they want to enact - so off we go back to the scrap box!  Send me your ideas and pics if you try these - especially if you do get some women done.  I'd love to see them!!
Happy Pioneer Day!  For anyone not from Utah, Pioneer Day is our State Day, and we celebrate the founding of the area by early pioneer settlers.  In honor of the pioneer fun, I'd like to share a couple of crafts I've done with my kids over the past couple of years that are appropriately themed.

Handcart Races
Now, I've been on a pioneer reenactment trek, and it is not a whole lot of fun to pull an actual handcart, but it is fun to make and play with these cute little carts!  I started off with a couple of Jiffy muffin boxes for cart bodies.  There are some paper templates online for origami handcarts, but I wanted something a little more solid - and most importantly, I wanted something that would actually roll.

The Jiffy mixes were just about right, but a little too oblong.  First off, I cut the front of the boxes off, opening up the bed of the cart.  Then I cut just about an inch of the length, cut slits at the folds the same length as the depth of the cart bed, and folded the sides in and the back up - glueing to close it all in.   I chose to paint my handcart boxes (actually I had my kids do it - they LOVE to paint anything, even if it's just boring brown), but they could alternately be covered in paper.


 The wheels are the most important part!  For the wheels, I used an empty ribbon spool, cut in half. I had to use a craft knife, and it was still pretty tricky, but it gave me a beautiful, sturdy, perfectly round wheel with a nice hub to keep the wheel from sitting too tightly against the handcart so that the wheels turn freely.  For the axle, I had to experiment a little to get the placement right.  It is NOT placed right in the center.  The balance, once the handle is added, does not work.  After looking at diagrams of real handcarts, I decided to place my axle a little forward of center - about half an inch.  My axle and handle are made of wooden BBQ skewers, cut to size (be careful here - when you cut them, the ends tend to fly around the room.  my kids love this phenomenon, but I find it a little dangerous).  The skewer must extend out of each wheel about a quarter of an inch.  I blacked out any writing on my wheels with a sharpie, then cut spokes out of cardstock and glued them on.  The whole wheel is finished off with a pony bead glued securely over the end of the skewer axle. Hot glue works great.


 The handle is attached in exactly the same way, using pony beads to secure the skewers that have been poked through holes in the box, only this time on the interior of the cart.  Then I took cross-lengths of skewers and glued them across, finishing up the handle.


Once I had two carts done, the races could begin.  This has become quite the favorite!  I use foam shape beads, but marshmallows or any small object would work.  Each participant is given equal amounts of whatever items the cart needs to be loaded with.  Another person shouts "GO" and both participant pioneers load their "handcarts" with "supplies" as fast as they can in whatever manner they want.  They then use the attached string (oh, did I mention I attached 18" of string?  It's too easy just to pull the handle - where's the fun in that?) to pull their carts across the table or floor to the finish line.  The handle must not drag, and nothing can fall out of the cart.  If anything does, it must be picked up, the pioneer must return to the start, load the item back into the cart, and then continue onward once again.  It's harder than it looks!  And it's a blast!!


EASY Pioneer Bonnets
As I mentioned before, I've been on a pioneer trek, and I sewed, or helped sew, dozens of bonnets.  They are an absolute PAIN!  The interfacing in the brim is the primary culprit.  Getting it stiff enough, getting it to cooperate, turning it inside out, getting the seams flat, it is not at all fun.  Just isn't.  But I love bonnets!  They're adorable!  So I came up with a plan to make them quick and dirty.  Well, hopefully not dirty bonnets, but my methods would surely be frowned upon by my pioneer ancestors because they're far from proper!


That pesky brim being the biggest problem - let's solve it with craft foam.  That's right - craft foam.  It is the perfect stiffness, light, cool, great colors, can even be decorated - the possibilities are endless.  And the most important thing in its favor?  YOU CAN SEW ON IT!!  Yea, probably old news to some of you, but still - HELLO!  Sew on craft foam?  Sweet! You can get two brims out of one large piece of craft foam - the 12 x 18 (I think?).  Just coordinate with a cute calico of your choice, cut out the pattern (or a reasonable facsimile - it doesn't need to be exact, just that rounded shape), and you're done with the brim.


For the crown, I keep it super simple, again.  This is a fast and easy pattern, remember, not an heirloom sewing project.  I'm not edge finishing or doing any fancy work.  It's possible - I have some lovely full quality bonnets - but that's not what I'm doing here.  So, I actually made up a pattern from looking at an old doll pattern and modifying it a little, then figuring out the measurements for a child size.  Run a gathering stitch along the rounded edge from dot to dot. Then simply pull the gathering thread, and sew the right side of the fabric to the straight side of the foam brim, as shown.  You could add lace between the two for a fancier look, or rick-rack, or cording - there are many cute options to dress it up.

Sew the fabric crown to the foam brim, using a straight stitch, with the right side of the fabric facing the foam.

What the sewn inside of the brim looks like - nice and neat, eh?
To get the cute little neck ruffle in back, edge finish the raw edge however you choose.  A tiny rolled edge would be pretty.  Lace sewn on would also look nice.  Again, I was mass-producing and going for fast and easy, so I went for the quick-and-easy zig-zag stitched edge.  It looks fine too :)  On the inside, along the straight line, attach a piece of 1/4 inch elastic with a zig-zag stitch.  A casing would be the nice way to go, but the zig-zag works great and looks just as good on the outside, see?  I used a 4 1/2 inch piece of elastic, but this should be sized to fit.  the tighter the elastic, the tighter it fits on the head.


Add elastic at neck, on inside, with a zig-zag stitch that goes through the elastic, stretching to fit as you sew

How elastic faux-casing looks on outside.  


The final step is the ties.  Matching a grosgrain ribbon to the brim, folding it over a couple of times, sew pieces about 16 inches long on the inside of the bonnet at the dots, trying to catch both fabric and foam brim in a zig-zag stitch.  Go back and forth over it a couple of times to make sure it's solid - kids tug on these quite a bit, and the more solidly it joins the brim to the fabric at this juncture point, the better.

Traditionally, the ties are made from the same fabric as the bonnet.  You are more than welcome to do that.  I hate turning skinny things inside out - yup, I'm lazy like that - I'll use ribbon here, thank you!
That's it!  It's like a 20 min or less bonnet!  No interfacing!  And if you're making it for a family pioneer day event, grab some foam paint, markers, or stickers and let the girls doll up their brims to personalize them!  I can see it now - Pioneers with BLING!  
bonnet on a 4 year old

same bonnet on a 6 year old
same bonnet on a 9 year old (getting a little tight)


Note: My pattern is a rough shape - I've made a lot of bonnets and they just aren't that technical.  The thing to know is the basic shape and proportions.  If you go higher and more oblong in the circle of the crown, it doesn't add much to the size, it just adds to the poofiness at the top.  Going wider in the circle does increase the size, but another way to increase the size is to increase the circumference around the brim by adding to the length along the straight side of the pattern (not too much though - there isn't much difference between this brim and the adult one I wear).  I used the same bonnet in all of the pictures in order to show how it fits a child size 3, the same child a year later size 4, a child size 6, and a child size 9.  I think it fits the younger girls great, but I would likely increase the brim to 17 inches and the crown to 14 inches wide if I were to make one specifically for my 9 year old. Hope that makes sense :)

We LOVE fingerknitting at our house!  Ever since my fabulously creative sister Natalie taught my kids to do it, they have fingerknit ropes and scarves and had so much fun.  Recently we have become even more focused on its possibilities, and though there are gorgeous projects using yarn of various weights - from pillows to hats - the projects usually use yarn.  I've never seen fingerknitting applied to other materials in the way my crazy kids have! By their experimentation, they have inspired my imagination.  Really, now that I've started, I just can't stop!  What different types of materials and yarns can create different results to be used for super-fun projects?


classic fingerknit segment
made with variegated yarn
First off, let's cover classic fingerknitting for those of you who, like I was at first, are not familiar.   Sport-weight yarn, my kids like variegated, is a good standard material, and we prefer the 4 finger interwoven method of knitting.  I've seen several methods online lately, most popularly the "lines across" version, but weaving in and out between the fingers produces the prettiest result, in my opinion.

yarn bracelet - made double long to wrap twice
How difficult is it to fingerknit?  Well, the main drive behind our sudden resurrection of fingerknitting was an assignment for my first grader called, "show and teach."  She taught her 1st grade class to fingerknit.  Not only does she fingerknit herself with precision and ease, but the kids in her class made themselves bracelets to wear home.  (disclaimer: there were a couple of kids in class who NEVER picked it up, and some took longer than others, but in the end at least half had it down well)  If a 1st grader can do it, it can't be that hard, right?  It isn't!  It's super, duper easy!!  I wanted to post my 1st grader teaching how to fingerknit here, but my computer is behaving wonky and won't process my video, so here is a tutorial I like a lot instead: Little Bird School of Stitchcraft.  Maybe I'll get the video up sometime - it's really adorable.

So, with Chloe teaching her class, our family was all excited about knitting again - especially Lily.  And she came home with this sweet little bracelet.  She had decided to try two fingers only, and instead of knitting the whole thing, just knitting a few knots to make a central motif for the bracelet.  The yarn is cream with a gold thread running through it, and it makes an adorable piece of textile jewelry.

Her next brainstorm was for her little friend who was having a birthday party.  It was a horse/cowgirl party, and Lily wanted to make her a cowgirl necklace.  She used a piece of leather cord, with a 3 finger knit (weave in and around only 3 instead of the full 4 fingers), knit about 4 times to make the center knot, then she threaded wooden beads on either end.  I crimped on a jewelry clasp, and was actually quite jealous to give it away!  I would wear this myself any day!

The leather idea opened the floodgates.  I started fingerknitting anything I could get my hands on.  I saw a blog that added bells at regular intervals to her fingerknitting.  The idea of adding bells inspired me to try adding beads.  But I didn't want yarn jewelry, so I used cotton embroidery thread and glass beads.  I adore the results!  This bracelet uses a 3 finger knit.

Barrette fingerknit with 1/4 inch ribbon.  4 finger knit.
Back side of barette, glued.  Loose ribbon ends looped under.
Ribbon and lace for hair accessories made me giddy!  More pricey than yarn, I opted to just do a little amount of ribbon to try it out, and made a barrette.
Barrette in my 4 year old's hair.

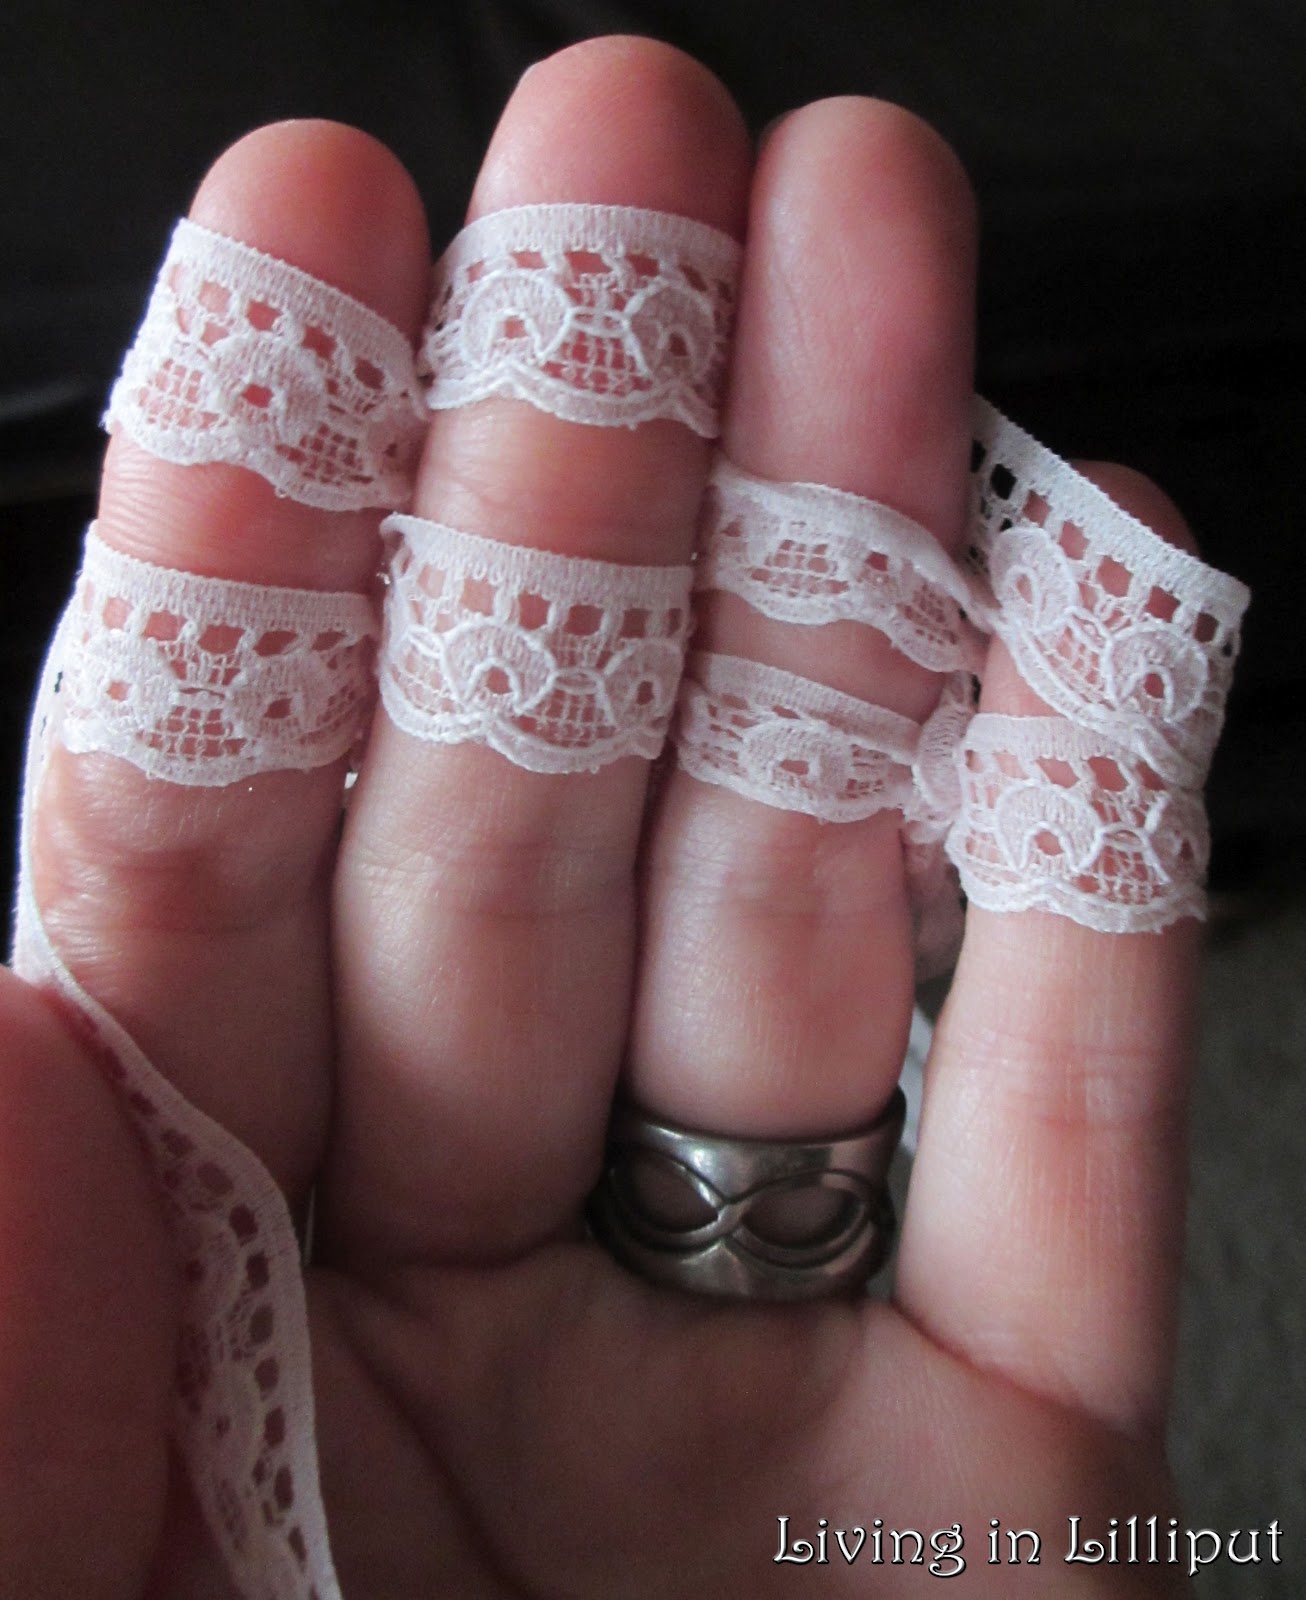
Fingerknitting with lace
But I happened to have a whole spool of a pretty antique vintage pink lace, so a headband it is!  The complete joy here is that fingerknitting stretches - the knots are flexible - so this headband fits super-comfortably and yet is sweet, vintage and so feminine!  I can't wait to make more in different colors!
Lace headband using 4 finger knit.
I adore the way the lace knit up! I knit the area from ear to ear, then left lace trailers on both ends to tie underneath so it wasn't too bulky at the back of her head.  The stretchiness means it fits any of my girls comfortably.  So pretty!  And it would be easy to clip a flower or bow on for variety.
Necklace Lily made from rainbow variegated cord
and a very loose 2 finger knit.


Yarn itself is still a great option though.  Lily makes crazy things like this fabulous snake with tons of personality.  Glued on googlie eyes and marker-colored tongue (just the trailer left from the end of the knitting) make a silly little home-made toy.  He pops up in the strangest places throughout the house.  Scarves are fun too - my kids like to knit three different colors and braid them together for a pretty scarf.  They make jump-ropes and belts and headbands.  Necklaces and bracelets and slings for their dolls.  It's quite amazing how far a skein of yarn can go when paired with a child's imagination!


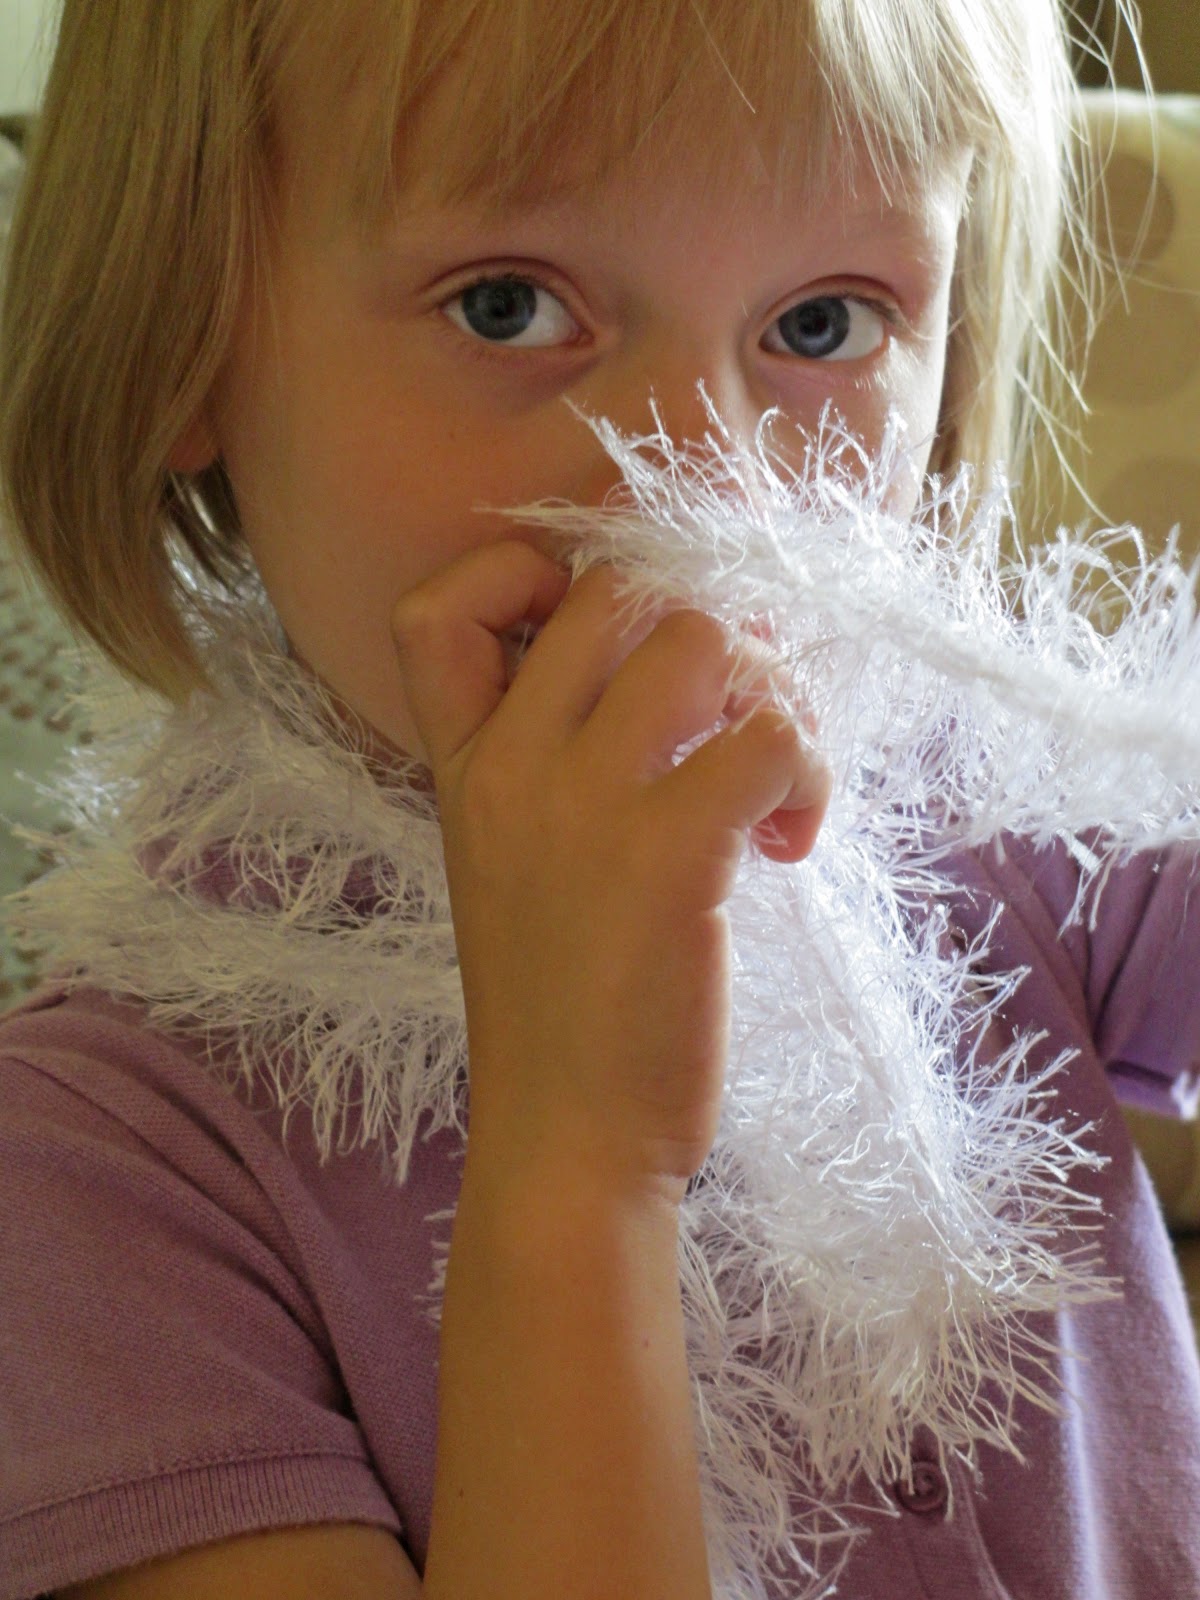
But my favorite project made out of yarn doesn't actually look like yarn!  Softer than the real boas that have sharp feather bits, these scarves are so rock-star!  The yarn is referred to as eyelash yarn, or sometimes fun fur.  It does look an awful lot like eyelashes too!  Individual strands do not look nearly as fluffy as it turns out being either.  The strand looks kind of spindly and pathetic, and like it would tangle and be a pain to knit.  NOT at all!  VERY easy, very fun!  I had some white, so that's what we used when we decided to try it, but it comes in a wide variety of really great colors!  A bit of a warning though.  The only other color I tried was gold metallic, and maybe someone smarter than me would have guessed, but it turned out looking EXACTLY like Christmas tinsel.  Not great.  I plan on avoiding metallics in all variety in the future.
As gorgeous as the eyelash yarn knits up, surely there are MORE possibilities!  Of course there are!  Eyelash yarn also turned into the mane and tail for a plush horse I sewed (Lily fingerknitted the mane & tail - I did the sewing - pattern found here).  I love the softness without any risk of shedding.


And a few months back, when I volunteered to help out with the Chinese New Year celebration at the school by sewing a Chinese dancing lion for their parade (yep, I am that crazy), and I couldn't afford fur or boas to trim the "mane" part of the lion costume, who fingerknit 15 yards of fuzzy trim out of eyelash yarn?  Yea, that'd be me.  It looked really cool!

Chinese parade lion for school.  I sewed the body and fingerknit the white trim & tail.
 I give major props to the amazing artist who did the paper mache head!  Amazing!


I owe this post completely to two people.  The first is my creative sister, Natalie, who one day introduced my kids to something I had never heard of...she called it fingerknitting.  Some of my kids were more intrigued than others, but it has proved to be a fabulous pass-time for traveling and conference and such, as well as a fun craft.  

But for a year, fingerknitting was on-again, off-again at our house.  We made scarves at Christmas, and ropes or belts whenever the kids wanted those.  It wasn't until recently, when Lily started getting creative with different materials, that my mind began to be completely blown by the possibilities fingerknitting offers!  So my 9 year old craft genius Lily is the second person to whom I dedicate this post.

So, there you have it.  Fingerknitting is a TON of fun, and the sky is the limit.  I already have plans bubbling over for more experiments.  Please send me pictures of anything you're inspired to try after reading this post - what can you come up with to fingerknit?
 
© 2012. Design by Main-Blogger - Blogger Template and Blogging Stuff