Welcome to Part 2 of the Merida party post!  It seems that blogger finally let me post part 1 in its entirety, and though I've already lost a pic on this post and I've just started writing, I'll keep my fingers crossed that we'll get through to the end.  Because what good are bows without ARROWS?!?  NO good, I say! And of all the tutorials for bows that I found online, I found very little about arrows and had to make it up as I went along, so I need to share and make the world a better place - it's what the blogosphere is about, right?! ;)

Supplies Needed:
Wooden Dowels (I chose 5/8" - the orange tipped ones)
Duct tape
Foam (I used pipe insulation left over from bows, but pool noodle foam or batting would work too)
Paint (optional)


Step 1: Cut dowels to 18".  I bought 36" dowels and cut them in half using a saw.  I sanded the edges a little so they wouldn't be rough.

If you want the arrows colored, now is the time to paint them, before putting the tips and fletchings on.  We faced a dilemma here because we wanted to stay authentic to Brave, and make realistic looking arrows, but we also knew that the arrows were likely to go missing deep in bushes in trees.  Therefore, we opted to paint them neon glow-in-the-dark and attach neon fletchings.  This is the BEST part for kids - they LOVED painting the arrows neon camo - which is a hilarious contradiction in terms ;)

Step 2: Add fletchings. Cut three pieces of Duct tape, approximately 2 - 3 inches long. It doesn't really matter, as long as all three are the same length.


 - Lay the dowel on an approximately 2 1/2"-3" strip of duct tape, leaving about an inch of the dowel at the end to grab on to when shooting (I learned this one the hard way, putting my first flight right at the end).

- Line up a second piece of duct tape, cut to be the same length as the first, along the edge of the first piece, with the dowel coming to the center of the second piece of tape as it does the first one.  Make sure to not let the two pieces of tape touch on the other side of the dowel - leave their sticky sides open.
- Line up a 3rd piece of identical duct tape along the final sticky edge of the original piece of tape.  Smooth to center and the dowel, then match up with second piece of tape and press all tightly to each other and to the dowel.


Looks like this
Step 3: Shape fletchings. Cut each flap into a triangle shape, tapering toward the front of the arrow. (Learned this one the hard way too - tapered my first one the wrong direction and my triangles faced the wrong way.)
Triangles need to look like this

Step 4: Safety Arrow Tips. Cut foam about 1 1/2", then cut in half.
- Wrap foam around tip of dowel.  I used a little glue (E6000) at first, but after a while I realized the tape alone held them on very securely.  *Note, my kids wore through these tips in only a couple of days and we added extra layers of foam.  On subsequent arrows, I started off double thickness and they have been fine - though I recommend checking them regularly as they do need to be re-tipped from time to time for safety.
-Wrapping a strip of duct tape around the fom tip keeps the foam from coming off in chunks when the arrow hits anything abrasive. Then using either electrical tape or more duct tape, wrap the base of the foam, around the dowel joining them securely.

Finished Arrow
Oh, I almost forgot that the arrows do need little notches for nocking them on the string.  You can see it in the Finished Arrow pic, that there is a tiny little groove in the bottom of the arrow.  I just used a file out of the toolbox.

I don't know about you, but I ADORED the movie Brave.  Not sure if it's the celtic thing, or the mother-daughter thing, or the nature thing, but the whole film just resonated with me.  So I was thrilled when Chloe chose Merida as her princess to emulate for her 7th birthday.

Immediately my mind whirred with big, BIG plans!  As usual, barely a fraction of those plans made it to fruition.  I dream on the scale of Disneyland-- I live on the scale of reality.  Reminding myself that even if I don't have 10 ft tall clan banners lining the walkway to my house as guests arrive, we can still have a grand time together keeps me focused on what matters. ;)

This series of posts includes everything I did (if not everything in my imagination) for a fun Brave themed birthday party.  Including:
*PVC Bow construction


An absolute necessity for a proper Brave party are bows & arrows - making this a BRAVE party on more than one level.  What kind of COURAGEOUS(insane) person plans a child's party with projectiles?! And on a budget, to boot.  I didn't want cheap dollar store bows that break in moments - I wanted bows that really work!  I was so excited when I found this tutorial and this one too on how to make bows out of PVC.  However, as I did modify and made some changes of my own, including clarifying some issues I found missing in other tuts, I'm going to outline my process:

BOWS
We wanted our bows to look more wood-like and less PVC-like, so we went with brown and opted to wrap the bow in duct tape rather than paint it.  Why?  Well, I got very excited about the tutorials, ran to the hardware store, got my supplies, came home and was looking online for more measurement details when I ran across several warnings that PVC shatters under pressure and should not be used to make bows. Now, granted, this was talking about 8 ft bows that were being used to hunt elk, not little kid bows that wouldn't have nearly the poundage of pressure applied, but it still scared me.  PVC slivers are crazy scary!  After some more research though, multiple recommendations of wrapping the bow in duct tape re-established safety precautions and we were back in business - if the bow splinters at all, the tape holds the splinters in until it can be disposed of instead of going into the operator's hand.
Supplies needed:
1/2" PVC (comes in 10 ft lengths - I got 3 bows per length)
Foam pipe insulation (comes in 6 ft lengths)
Nylon chord
Duct tape
Electrical tape (optional)
Step 1: Measure PVC to desired length.  I was able to get 2 longer and 1 shorter bow (older and younger kids) out of each PVC length.  *Note, I made shorter bows for younger kids (5 and younger) but the older kids told me that actually the shorter bows were more powerful and accurate.  I'm not sure how right they are about that, but it was a unanimous opinion.
Step 2: Cut PVC to length.  I've been told you can get this done at Home Depot when you buy the PVC, but I enjoy using power tools, so I did it myself.  Remember to use safety goggles!  This stuff flies everywhere!
Step 3: Wrapping at a diagonal, cover the entire length of the PVC in duct tape.  The options for fantastically wild colors here are endless, but we wanted ours to be BRAVE-like, so woodish brown is what we chose.


Step 4: Drill a hole through tape and PVC approximately 1/2 to 3/4 inches from the top in only one side of PVC.  Repeat at other end of bow on the same side.


Step 5: Thread nylon chord through hole and out the end of the PVC.  Tie off with a solid knot.
Step 6: Using your feet (or one of your older kids if they're around) to hold the bow & bend it to desired shape, thread the chord through the opposite hole and tie a firm knot, keeping bow string taut.
Melt ends of nylon chord so that it doesn't come unraveled.  This will also keep your knot firm.


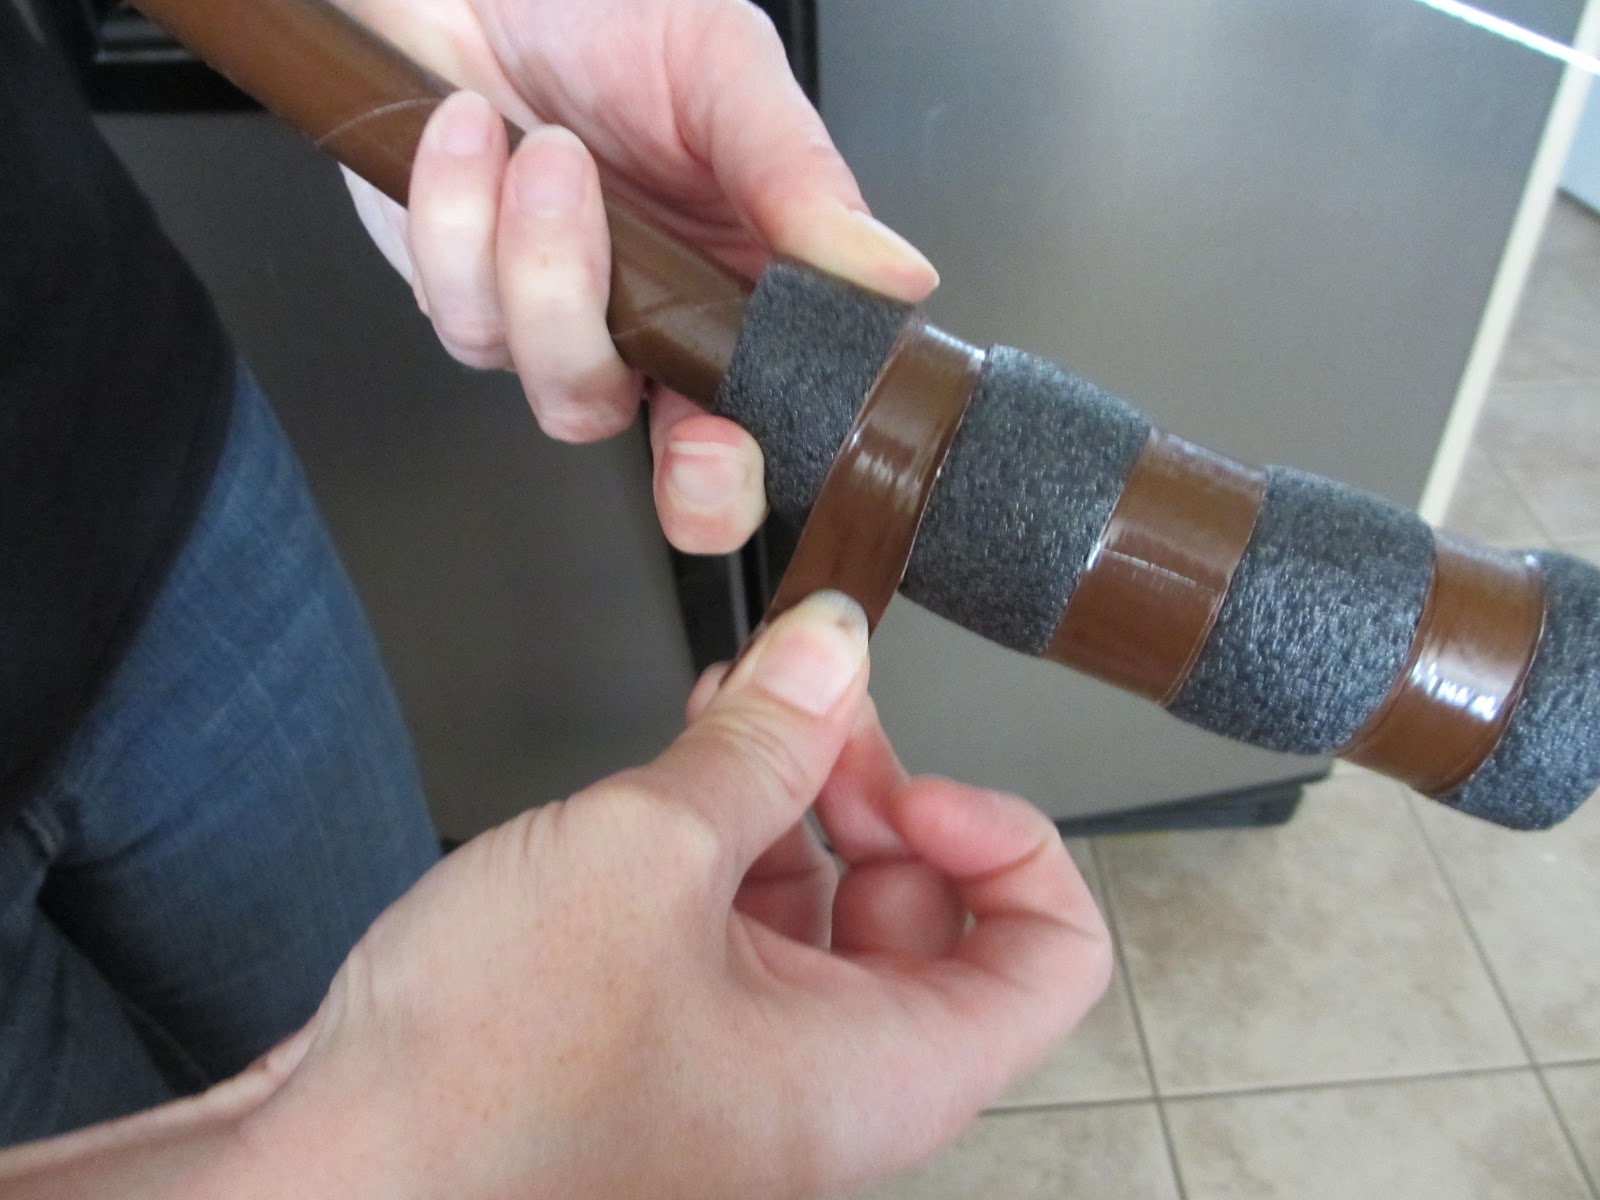
Step 7: Add the Grip. Cutting the pipe insulation to whatever length you like (I used 6" grips on my bigger bows, 5" for the smaller), open up the seam and wrap the foam around the center of the bow, right where it arcs the most.

Wrap grip in tape - either electrical or strips of duct tape - remembering to keep it tight.  We had issues in subsequent weeks with the grips spinning due to loose tape.

Step 8: Finish off by wrapping the raw ends in tape - again either electrical or duct, whichever.  I had some of each because I ran out of electrical tape, and both have been about the same as far as durability, though I might give the edge to the duct tape, if I had to.

I was running out of time and turned to my kids to find a solution for personalizing the bows.  I showed them a picture of Merida's bow and how she had carved it, explained we couldn't carve our PVC bows but would like some distinguishing decoration, and they - brilliant children - did this! Electrical tape and curling ribbon from our wrapping paper supplies! I think they're marvelous.  It gave me all sorts of ideas for washi tape, but for being spur-of-the-moment, they worked really well, and surprisingly, 7 months later, after a LOT of use, most of the decoration is still perfectly in tact.


*Note: Due to blogger constantly deleting half my pics, etc as I was typing it, this lengthy post kept getting shoved back in the file out of frustration.  So I've decided to post it in parts - one piece of the party at a time, to shorten the post before it can get deleted - again.  Bonus for readers though, I can now add notes as to what did and didn't stand the test of time and much, much abuse from the kids!
Go to A very BRAVE birthday party - part 2: Arrows

Go to A very BRAVE birthday party - part 3: Goodies & Fun Stuff


This is a bit of a departure for me - I've never posted a recipe before!  But when I put the picture of this silly cake on instagram, people started asking.  So here I go - venturing into the unknown.

My husband is Mtn Dew obsessed.  He doesn't drink it regularly enough for me to call him an addict - it's more like his special treat.  For Valentine's, instead of chocolate, he got Dew.  Said it was the best Valentine's EVER.

So when his birthday came up, I decided to surprise him with a Dew cake.  I looked at several recipes, and, as I usually do, ended up combining ideas from a bunch and then added my own twist.  Which is why I'm posting rather than just providing a link. (Not that the world needs one more Dew Cake recipe. I was surprised to find so many!)

The big difference between mine and every other recipe I saw is orange juice.  I didn't see any that included orange.  Lemon, vanilla, almond, even coconut - but no orange.  Yet Mtn Dew isn't a lemon-lime soda - it's orange based.  In fact, a friend of ours (also a Dew lover), told me that he remembers when Dew used to have orange pulp in it.  I don't add a lot of orange to this cake/glaze- and I think I'd like to even experiment more with upping that quantity (though the cake is already so moist I'll have to be careful about my liquid ratios), but the results are quite good.

Out of my 8 tasters, 5 say the cake tastes just like Dew.  The others say it doesn't, taste like Dew, but is one of the yummiest cakes ever.  I'll take that!  So without further ado:

Mountain Dew Cake:
1 box lemon cake mix
1  3.4 oz box lemon pudding mix
4  eggs
1 1/4 c Mountain Dew
2 tsp lime juice
1/2 c orange juice
1/2 c oil

Preheat oven to 325 if cooking in a bundt pan like I did. (Don't bother asking about different pans - I haven't tried yet so I don't have a clue!).  Spray and flour pan.

Combine dry cake mix with dry pudding mix. Add eggs, oil, lime juice and orange juice.  Very slowly add Mtn Dew. (V-E-R-Y slowly, unless you like cake mix foam all over your counter top).  Mix at medium until blended and there are no more lumps.

Pour into bundt pan and bake 45-50 min. (again, I'm clueless as to times for other sizes of pans - maybe follow directions on cake mix box?)

Let cake cool a bit (5 min or so) then turn onto plate or platter.  Cool a little more while making glaze, then poke holes in cake using a fork.


Glaze:
2 Tbsp butter
1/2 c sugar
1/4 c Mountain Dew
2 Tbs orange juice
1 tsp lime juice
Neon green food coloring (optional)

In a saucepan over low heat, melt butter.  Add sugar.  Stir to incorporate. SLOWLY add Mtn Dew, then add lime and orange juice.  Bring to a boil, turning up heat if needed, stirring often.  Boil for a few minutes until glaze is clear and begins to thicken to a syrup.  (At this point, I added a few drops of neon green food coloring to make it Dew colored.  It doesn't show up much on the exterior of the cake, but on the slices, it gives the edges a fun Dew-green halo)

Spoon glaze over cake previously perforated with a fork.  Cool cake completely before serving.  In fact, it's better the next day after sitting in the fridge overnight.

Final note, it may be overkill, but a dollop of whipped cream (or some spray cream in my case) on each slice of cake is just heavenly!


**UPDATE** Vanilla Cream Cheese Icing:
In the year since making this cake, our family has discovered the dangerously delightful combination of vanilla flavored additions to Mt. Dew.  Adding vanilla creamer to Dew, or making a Dew float with some vanilla ice cream.  Thus it followed that if I added a vanilla cream cheese icing to my Dew Cake, it couldn't help but be fabulous...and I was right.  Here's the recipe I used:
1/4 c butter (softened)
4 oz cream cheese (softened)
3 tsp vanilla
1-2 c powdered sugar
milk (if needed for consistency)

Beat together butter and cream cheese. Add vanilla and beat until light and fluffy.  Gradually beat in powdered sugar.  If necessary to achieve a spreadable consistency, add milk a very little at a time - not exceeding 2 Tbsp. The icing should be thick enough to not run, but thin enough not to form stiff peaks.

Enjoy!

(Funny little inside story, just because it makes me laugh.  Several years ago I begged my husband for a bundt pan for Mother's Day because there was a specific recipe I needed it for.  He has a policy of not giving me kitchen supplies as gifts, so it wasn't until Christmas that he actually gave in and got me the pan I refused to buy myself- by which time I had completely forgotten why I wanted it!  To this day I cannot remember the recipe that made me NEED a bundt pan.  Consequently, THIS CAKE is the FIRST time I've ever used the pan I harassed my poor husband into breaking his gift policies for.  It's fitting that it was for his birthday.)


One of our go-to crafts around here is shrink art.  Ever since my sister gave us the mind-blowing information that #6 recyclable plastic is shrink capable, whenever my kids want a craft, and I'm feeling non-mess, more independent crafting shrink art is what I can pull out.  Wait, you say, did I hear that right?  #6 plastic is shrink art? YES, it is!  I save packages from deli sandwiches,  some produce, lots of take-out - wash it out and VOILA! Shrink art extravaganza! Free crafting is the best crafting!!  

A few cons I've discovered - #6 doesn't shrink as uniformly as the store-bought stuff, and even if you rough it up with sand paper, colored pencils don't work as well on it (colored pencils don't work AT ALL if you don't sandpaper it).  So we use a set of permanent ink markers and all is well.  My kids like to trace their favorite characters or make freehand art.  Punch a hole before baking, and make necklaces, charm bracelets, sun catchers, whatever!  They love the detail they can get in such tiny charms.  You can tell the detail varies with the age of the artist - as always!

RINGS

The last time they got out the plastic, I wanted to try something I'd seen on Pinterest - making rings.  Only I couldn't find where I'd pinned it, so we made it up as we went along.  (note to self: clean out and organize Pinterest boards!)

The first thing we discovered, #6 plastic DOESN'T WORK WELL FOR RINGS.  It was OK, it shaped fine and looked fine, but the inconsistent shrink rate meant that every ring was a whole different story.  Sometimes it worked great, sometimes a warped mess.  Also it's a bit thicker, which was not ideal. So while we still love #6 for other art, we had to try something else if we wanted rings.

Solution?  Pull out the professional stuff.  I had a package of Shrinky Dinks Frosted Ruff n'Ready, and we were set to make rings.  A little experimentation with size and we were off.
For my older kids (9-13 years old), we found the right pre-shrunk size to be 5 1/2" x 3/4".  For my younger girls (5 & 7 years old),  5" long was perfect.  The 5" length is great because the sheets of shrink art are 8" x 10", so cutting a sheet right down the middle gets a high yield of rings per sheet.
We chose to make CTR rings with our shrinky dinks - though after they were done, there were many other varieties of original art rings as well!  The first and VERY IMPORTANT thing we discovered was that the rough side, the side you draw on, is the inside of the ring.  This means that any writing needs to be done MIRROR IMAGE. I printed out a backwards CTR, and the kids chose their colors and got tracing.
The kids went to town on their designs.  I love how their personalities are reflected in their unique rings.  For my youngest, who lost interest, I finished her sunshine ring.  Just remember to draw on the ROUGH SIDE of the shrink art, and you can use colored pencils on this stuff, but if you use ink use PERMANENT INK.  One of my daughters just grabbed a felt tipped pen and after wearing the ring for a while, her finger was black with ink and the ring was smudged.
Shrink the rings according to the package directions (mine says 325 degrees for a conventional oven for about 3 min or until it lays flat).  This is the fun part for kids, so turn on the oven light and let them watch the antics of the shrinking plastic!  Remember to place on brown craft paper for baking - I use grocery bags cut in half.  NOTE - these do sometimes stick to themselves while baking.  Carefully, and I wore light knit gloves for protection, pull the pieces apart and return promptly to oven.

Remove from oven and quickly (again I wore gloves), wrap around a round object of the right size.  
You've got about 10 seconds to get this done, so have your mold ready.  We looked around the house
and ended up with markers and fingernail polish lids as offering the best diameters for rings.  If you mess up, it cools too quickly, or something else goes wrong, just put the ring back in the oven for a couple more minutes and try again.  We did learn though that this has its limits.  Notice the difference in color in the floral ring above - it was baked repeatedly because we couldn't get the size just right.  Repeated baking affected the color, but it also made it brittle.  The ring broke a couple days later and we had to try again with a new ring.


Finished Rings:


Had to throw in the Green Lantern ring too - for good measure!   My kids made magic rings, name rings, rings until I ran out of patience!  The only ring they couldn't get to look just right for them was the One Ring ;)
As always, I love to hear comments, especially if you try it yourself.  Send me pictures and I'll post them!  Have fun!!


Top o' the mornin' to ye.  Not much to say about this wee crafty.  My kids were hankerin' for a craft - I was feelin' the lack o' the green round our house now that March is here.  Went lookin' for ideas and came across this Valentine craft on Pinterest, which I adapted for St. Patrick's Day simply by changing the shape and the color of the crayons.

It's a super simple craft, and it's extra fun because it surprises the kids - they don't know what's going to happen to the crayon bits, making it sort of science-experiementy to boot!  The final results are so pretty!  I keep finding myself in front of my window studying the individual patterns in each shamrock.

Supplies Needed:
Wax Paper
Crayons
Pencil sharpener or knife
Iron & ironing board
Craft paper

  1. Place a sheet of craft paper on the ironing board to protect it from the melting wax (I ended up doubling this, just in case)
  2. Place a sheet of wax paper on top of the craft paper.  This will be one side of your "stained glass" shamrock.
  3. Shred crayons onto wax paper.  We started out using the pencil sharpener like the valentine's tutorial explained, but found that it was easier, quicker, and more effective to chop the crayons finely using a knife and cutting board (mom job, not kid job!). **NOTE: Use multiple shades of colors for the best effect.  You'll notice that we have some yellow, some blue, and several shades of green.  These blend together to end up green overall, with spots of neat variation, but otherwise it's drab.
  4. Place a second sheet of wax paper over top of the shredded crayons.
  5. Cover your wax paper - crayon sandwich with another sheet of craft paper to protect your iron. (Just so you know - it doesn't REALLY hurt the iron, and looks really cool to see the crayons melt and blend if you want to show the kids what's going on for just a second before you cover it all up to really go to town on the whole thing.  I tried it ;) )


6. Using the iron on a low to medium heat, and working from the center to the outside edges, press the crayon shreds until they are all melted to desired effect. 
8. Cut out traced shamrock shapes

Hang and Enjoy!!

 
© 2012. Design by Main-Blogger - Blogger Template and Blogging Stuff