

I don't know about you, but I ADORED the movie Brave. Not sure if it's the celtic thing, or the mother-daughter thing, or the nature thing, but the whole film just resonated with me. So I was thrilled when Chloe chose Merida as her princess to emulate for her 7th birthday.
Immediately my mind whirred with big, BIG plans! As usual, barely a fraction of those plans made it to fruition. I dream on the scale of Disneyland-- I live on the scale of reality. Reminding myself that even if I don't have 10 ft tall clan banners lining the walkway to my house as guests arrive, we can still have a grand time together keeps me focused on what matters. ;)
This series of posts includes everything I did (if not everything in my imagination) for a fun Brave themed birthday party. Including:
*PVC Bow construction
An absolute necessity for a proper Brave party are bows & arrows - making this a BRAVE party on more than one level. What kind of COURAGEOUS(insane) person plans a child's party with projectiles?! And on a budget, to boot. I didn't want cheap dollar store bows that break in moments - I wanted bows that really work! I was so excited when I found
this tutorial and
this one too on how to make bows out of PVC. However, as I did modify and made some changes of my own, including clarifying some issues I found missing in other tuts, I'm going to outline my process:
BOWS
 |
We wanted our bows to look more wood-like and less PVC-like, so we went with brown and opted to wrap the bow in duct tape rather than paint it. Why? Well, I got very excited about the tutorials, ran to the hardware store, got my supplies, came home and was looking online for more measurement details when I ran across several warnings that PVC shatters under pressure and should not be used to make bows. Now, granted, this was talking about 8 ft bows that were being used to hunt elk, not little kid bows that wouldn't have nearly the poundage of pressure applied, but it still scared me. PVC slivers are crazy scary! After some more research though, multiple recommendations of wrapping the bow in duct tape re-established safety precautions and we were back in business - if the bow splinters at all, the tape holds the splinters in until it can be disposed of instead of going into the operator's hand.
|
Supplies needed:
1/2" PVC (comes in 10 ft lengths - I got 3 bows per length)
Foam pipe insulation (comes in 6 ft lengths)
Nylon chord
Duct tape
Electrical tape (optional)
 |
Step 1: Measure PVC to desired length. I was able to get 2 longer and 1 shorter bow (older and younger kids) out of each PVC length. *Note, I made shorter bows for younger kids (5 and younger) but the older kids told me that actually the shorter bows were more powerful and accurate. I'm not sure how right they are about that, but it was a unanimous opinion.
|
 |
Step 2: Cut PVC to length. I've been told you can get this done at Home Depot when you buy the PVC, but I enjoy using power tools, so I did it myself. Remember to use safety goggles! This stuff flies everywhere!
|
Step 3: Wrapping at a diagonal, cover the entire length of the PVC in duct tape. The options for fantastically wild colors here are endless, but we wanted ours to be BRAVE-like, so woodish brown is what we chose.
 |
Step 4: Drill a hole through tape and PVC approximately 1/2 to 3/4 inches from the top in only one side of PVC. Repeat at other end of bow on the same side.
|
 |
| Step 5: Thread nylon chord through hole and out the end of the PVC. Tie off with a solid knot. |
 |
Step 6: Using your feet (or one of your older kids if they're around) to hold the bow & bend it to desired shape, thread the chord through the opposite hole and tie a firm knot, keeping bow string taut.
|
|
Melt ends of nylon chord so that it doesn't come unraveled. This will also keep your knot firm.
|
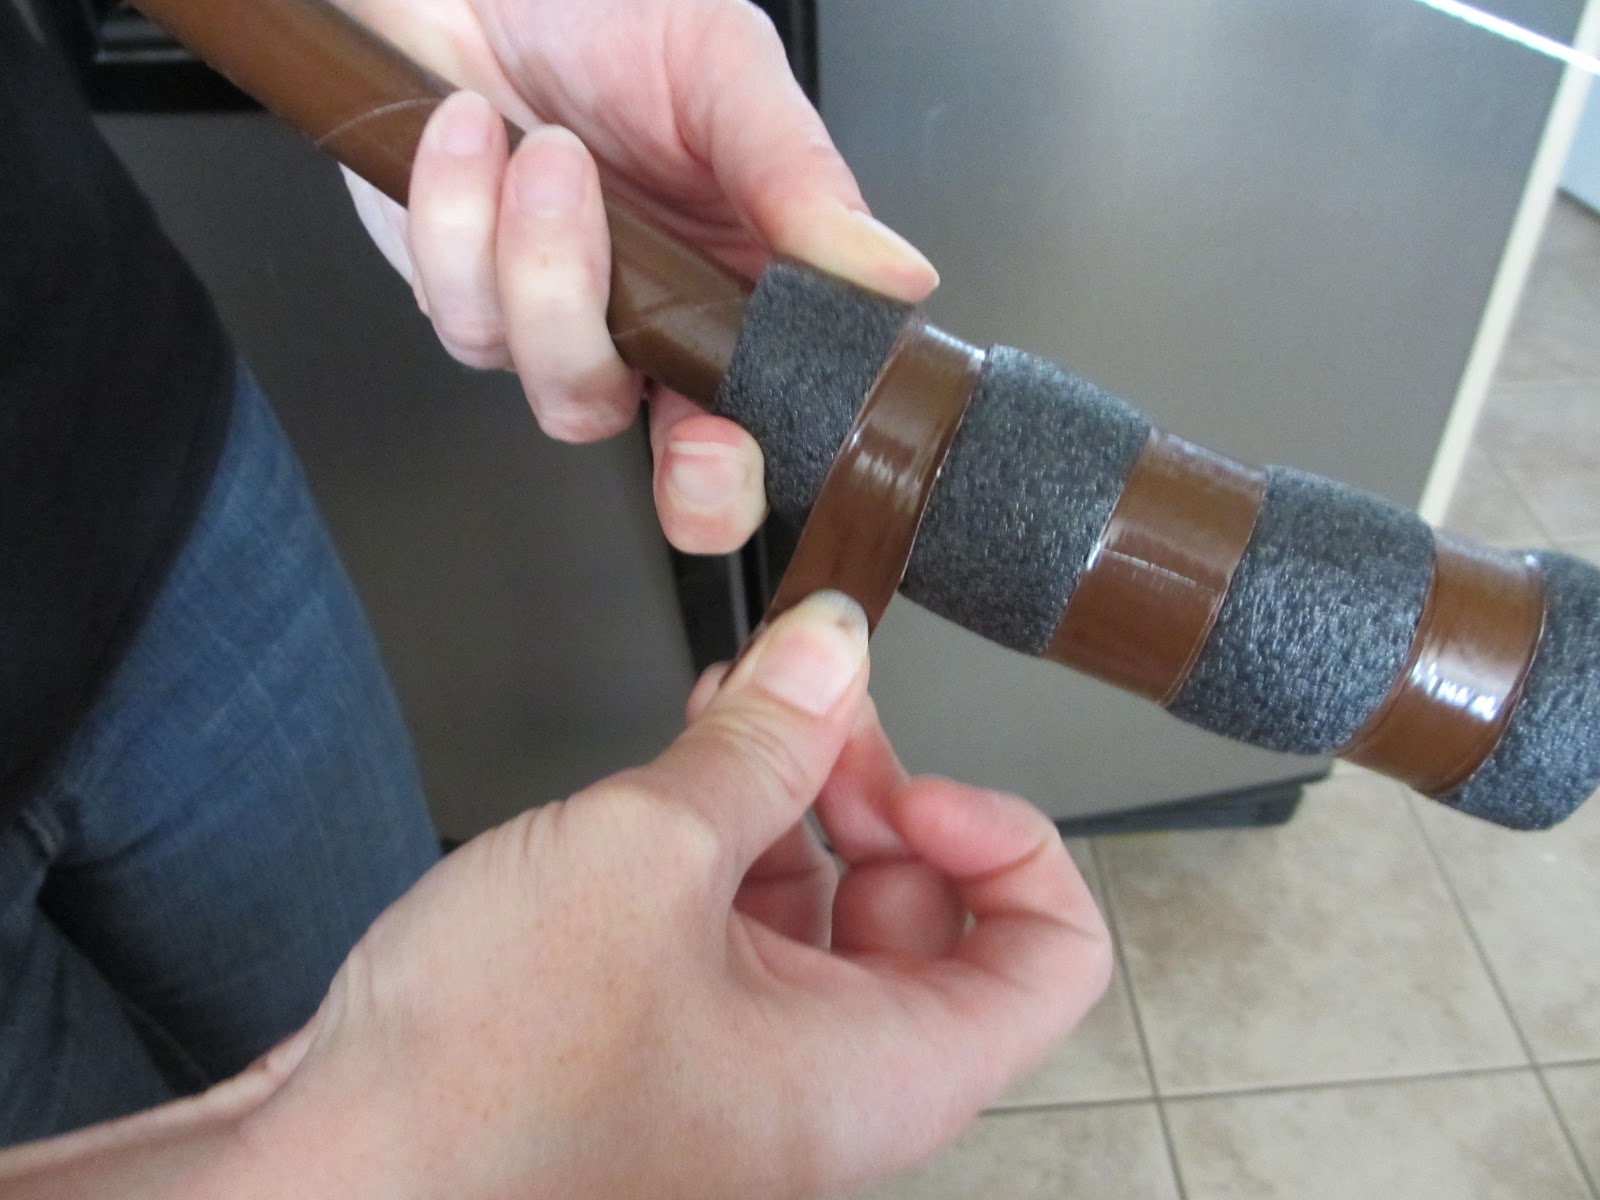
Step 7: Add the Grip. Cutting the pipe insulation to whatever length you like (I used 6" grips on my bigger bows, 5" for the smaller), open up the seam and wrap the foam around the center of the bow, right where it arcs the most.
|

Wrap grip in tape - either electrical or strips of duct tape - remembering to keep it tight. We had issues in subsequent weeks with the grips spinning due to loose tape.
 |
Step 8: Finish off by wrapping the raw ends in tape - again either electrical or duct, whichever. I had some of each because I ran out of electrical tape, and both have been about the same as far as durability, though I might give the edge to the duct tape, if I had to.
I was running out of time and turned to my kids to find a solution for personalizing the bows. I showed them a picture of Merida's bow and how she had carved it, explained we couldn't carve our PVC bows but would like some distinguishing decoration, and they - brilliant children - did this! Electrical tape and curling ribbon from our wrapping paper supplies! I think they're marvelous. It gave me all sorts of ideas for washi tape, but for being spur-of-the-moment, they worked really well, and surprisingly, 7 months later, after a LOT of use, most of the decoration is still perfectly in tact.

 |
*Note: Due to blogger constantly deleting half my pics, etc as I was typing it, this lengthy post kept getting shoved back in the file out of frustration. So I've decided to post it in parts - one piece of the party at a time, to shorten the post before it can get deleted - again. Bonus for readers though, I can now add notes as to what did and didn't stand the test of time and much, much abuse from the kids!
Go to A very BRAVE birthday party - part 2: Arrows
Go to A very BRAVE birthday party - part 3: Goodies & Fun Stuff
|


