


I have been dying to get this written up and posted! It is a, long post - because there is whole lot of FUN!! Chloe delighted me by choosing a fairy theme for her birthday party. As a life-long fairy obsessed aficionado, my mind was bursting with ideas - only a fraction of which actually came to life. But what did come together tickled me pink!
 The invitations were pretty simple. I adore Cicely Mary Barker (my collection of her books is on the 'don't touch without permission shelf', although my girls have duplicate well worn versions on their own bookcase), so one of her delightful fairies had to make an appearance. This pixie, who reminds me of Chloe, is the Candy Tuft Fairy.

Guests arrived through a fairy bower of tulle and flowers. Tulle is a fantastic decorating option because it gives a lot of bang for the buck, especially when it goes on sale. Draping it, tying it in bows, gathering it over windows, so many possibilities for frilly-girly sweet decor! (Pic doesn't do it justice, it was so sweet)
 The hanging light over the table became a floral chandelier with giant flowers, curling ribbon, and dragonflies. It was my favorite, and I left it up for at least a week after the party! Oddly enough, it was all made of on-hand supplies. The giant gerber daisies I had bought to go with flower-fairy costumes a couple halloweens ago, the giant tulips are actually hats that my girls got with their cotton-candy at the Tinkerbell Disney on Ice last year. And the dragonflies were garden decorations that once-upon-a-time were attached to stakes, but I had removed those and had mounted them to my boys' jungle themed bedroom ceiling when they were little.


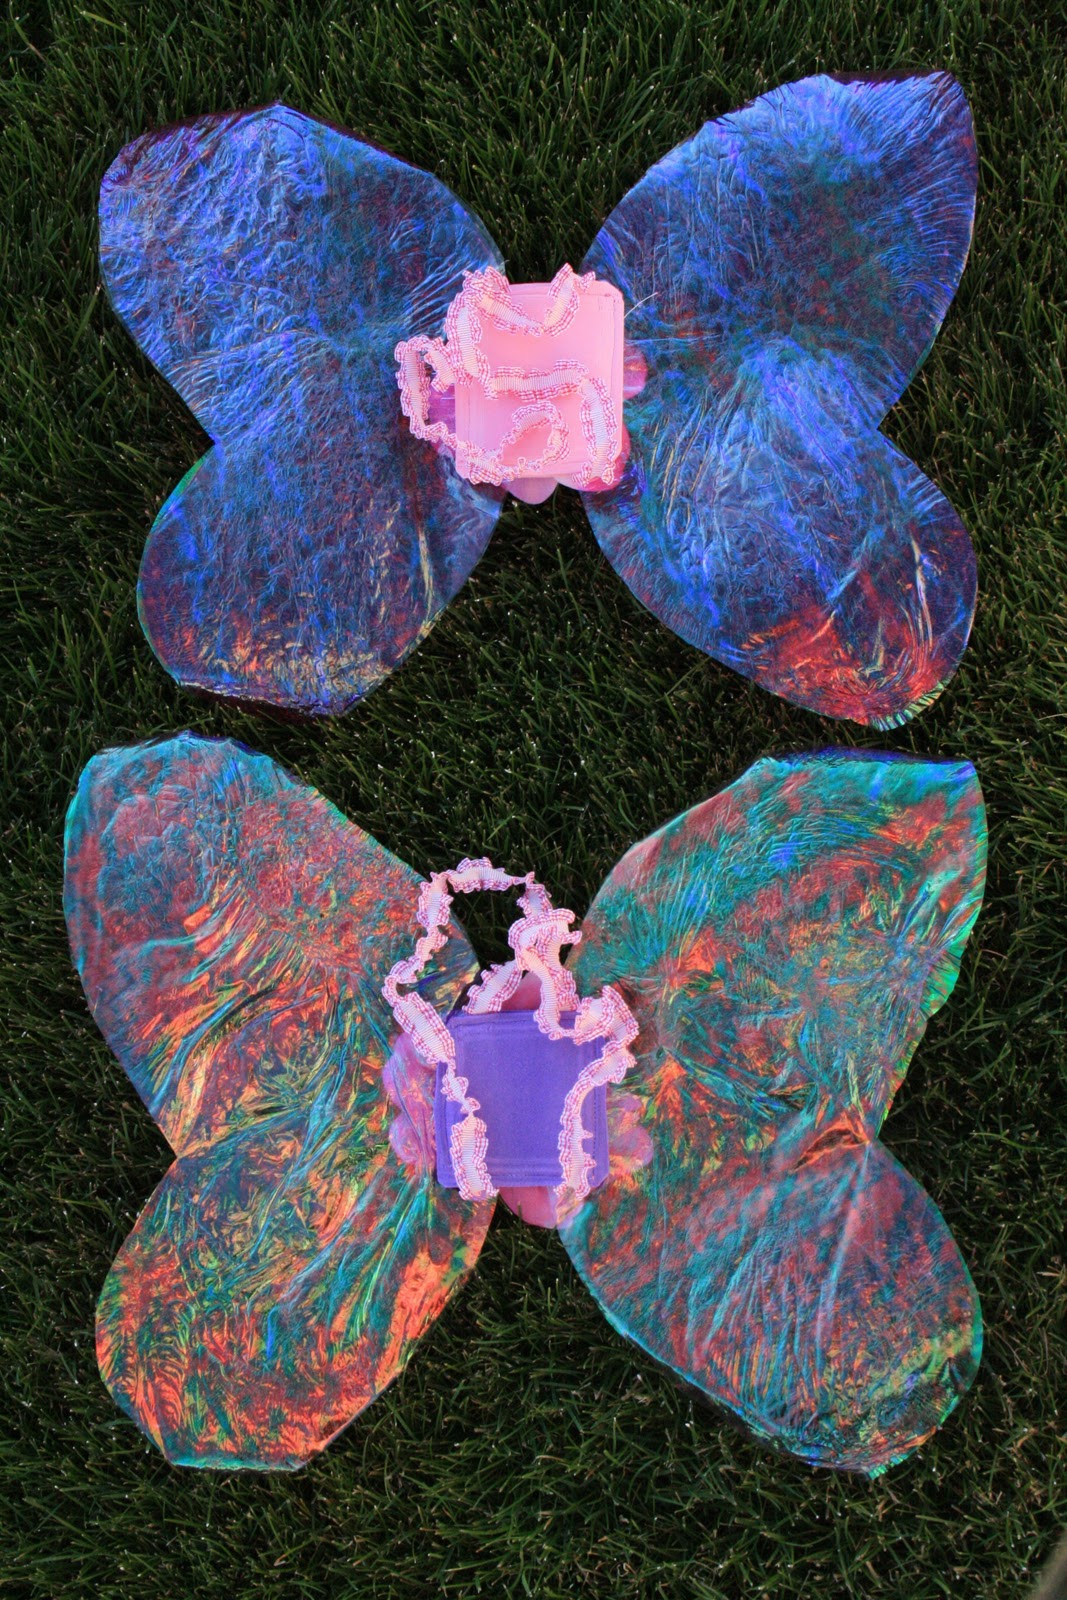
 Without wings, a fairy just isn't a fairy! But without the budget to purchase wings for all the guests, (and of course, the dollar stores never cooperate by having them when I want them, but a mere few weeks later have a whole display of wings in an assortment of colors!) I had to get creative. I love nothing better than to get creative!! I'll whine about it, I'll complain that stores should anticipate my needs, but in truth, I love trying to figure out how to do something unique. I already knew that I did not want to do the tights-on-a-coat-hanger method of wings. It is a lot more work than the tutorials make it sound like it is, and I've never been happy with them. So I created these fancy little gossamer wings that look very realistically pixie-like. For the tutorial, click here.

Finally, after playing flying games, and changing seasons games and other fairy games, the fairy guests did the last obvious necessity - they made fairy wands. The simplest of the simple crafts - a funfoam wand that they decorate with glitter, jewels and stickers. Lovely.


Then as they were leaving, they received a sweet little party favor that had strawberry candies, bubbles (I painted the lids with glitter paint to make them more pixie-dusty), and a butterfly barrette.
Happy Flying!!
 The invitations were pretty simple. I adore Cicely Mary Barker (my collection of her books is on the 'don't touch without permission shelf', although my girls have duplicate well worn versions on their own bookcase), so one of her delightful fairies had to make an appearance. This pixie, who reminds me of Chloe, is the Candy Tuft Fairy.
Guests arrived through a fairy bower of tulle and flowers. Tulle is a fantastic decorating option because it gives a lot of bang for the buck, especially when it goes on sale. Draping it, tying it in bows, gathering it over windows, so many possibilities for frilly-girly sweet decor! (Pic doesn't do it justice, it was so sweet)


Toadstools are just as essential as flowers for a fairy party, so we set to work making a bunch to place around. See my post for how to paper mache some toadstools of your very own!


Finally, after playing flying games, and changing seasons games and other fairy games, the fairy guests did the last obvious necessity - they made fairy wands. The simplest of the simple crafts - a funfoam wand that they decorate with glitter, jewels and stickers. Lovely.


Then as they were leaving, they received a sweet little party favor that had strawberry candies, bubbles (I painted the lids with glitter paint to make them more pixie-dusty), and a butterfly barrette.
Happy Flying!!


